The Best DIY STEM Tutorials and Projects

OVERVIEW
Hey there, Science Explorer! Today, we’re going to discover an amazing tool that will be the foundation for all our future electronic adventures. It’s called a breadboard, and it’s like a superpower for creating cool projects!
What is a BreadBoard?
A breadboard is a fantastic platform that helps us connect and experiment with different electronic components easily and safely. It’s like a secret lair for our electronic heroes, such as resistors, capacitors, and LEDs, to come together and work as a team.
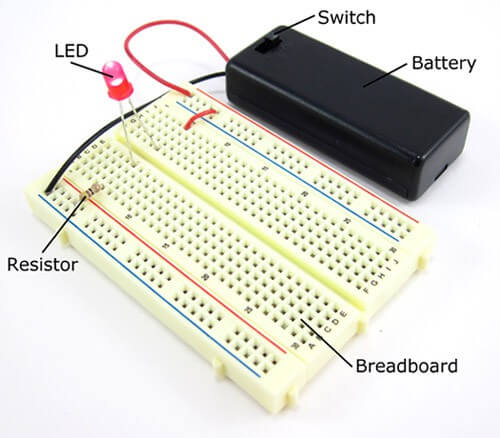
This incredible invention is designed with lots of tiny holes arranged in a grid pattern, allowing us to plug in our components and let them communicate with each other. Hidden beneath the surface, there are metal strips that act like bridges, helping electricity flow smoothly from one hero to another.
Using a breadboard, we can build all sorts of awesome projects, from a dazzling light show to a clever gadget that solves problems. The best part is, if we want to modify our invention or explore new ideas, we can easily rearrange the components without any messy soldering or permanent connections.
So, get ready, Science Explorer! With the mighty breadboard by our side, there’s no limit to the electronic marvels we can create together. Let’s embark on this electrifying journey and unleash our inner inventors!
Where does the name “breadboard” come from?
You may be curious about why we call this incredible electronics tool a “breadboard.” The name has an interesting history that takes us back to the early days of electronic tinkering. Back then, creative inventors would use their wooden cutting boards, originally meant for slicing bread, to build their circuits. They would drive nails or screws into the board to hold their components and make connections.
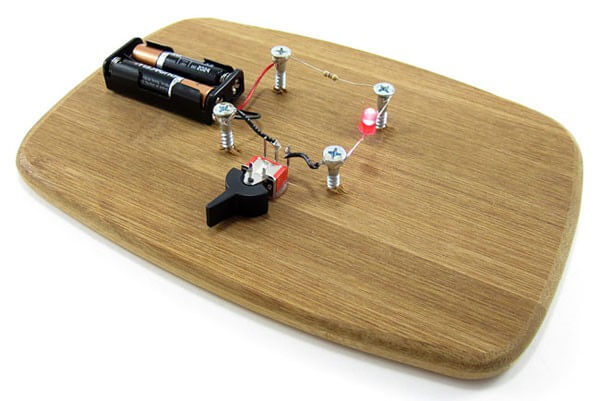
Fortunately, nowadays, we don’t have to sacrifice our trusty cutting boards for the sake of exploring electronics! Modern breadboards have come a long way, providing a convenient, reusable, and safe platform for us to experiment, learn, and create all sorts of amazing projects. So, embrace the fun world of breadboards, knowing that your kitchenware is safe and sound!
Check out this video for a comprehensive and engaging explanation of breadboards
Using BreadBoard
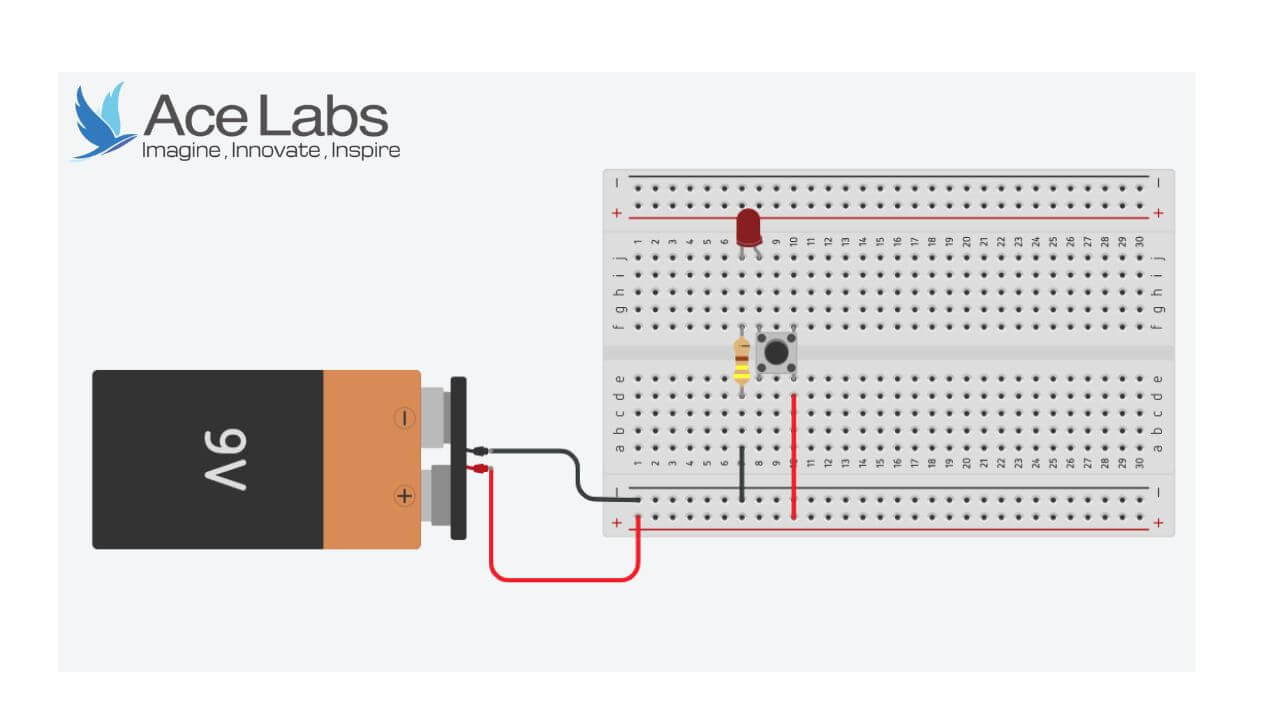
Get ready to embark on an exciting adventure in the world of electronics! We’ll be creating your very first circuit on a breadboard by following the simple circuit diagram provided below. This beginner-friendly project will help you learn the basics of breadboarding while assembling a fun LED light-switching circuit.
The diagram will serve as your step-by-step guide, showing you how to connect the components on your breadboard correctly. By carefully following the instructions, you’ll bring the LED to life and experience the joy of illuminating it with just the flick of a switch.
So, gather your components, prepare your breadboard, and get set to unleash your inner inventor! As you work on this engaging project, you’ll not only discover the magic of breadboarding but also take the first steps toward mastering the art of electronics. Happy building!
this is a similar project as shown in the video above (just with the addition of a switch button)
step by step guide to making this project
Fantastic job! Have you successfully lit up your LED? If so, we’d love to see your accomplishment. Please share a photo of your glowing creation with us!
However, if you’ve encountered any issues and your LED isn’t shining bright, don’t worry. We’re here to help! Share your concerns or questions with us in the comments, and our friendly community of fellow explorers will gladly offer their guidance and support.
Remember, every challenge is an opportunity to learn and grow. Together, we’ll make sure you conquer the world of breadboarding and electronics!


