The Best DIY STEM Tutorials and Projects

OVERVIEW
Dive into the world of colors with the RGB LED Color Codes project! By mixing red, green, and blue light, we can create endless colors using code. It’s like having a tiny rainbow at your fingertips! 🌈✨
You can follow this video and the instructions below.
Video
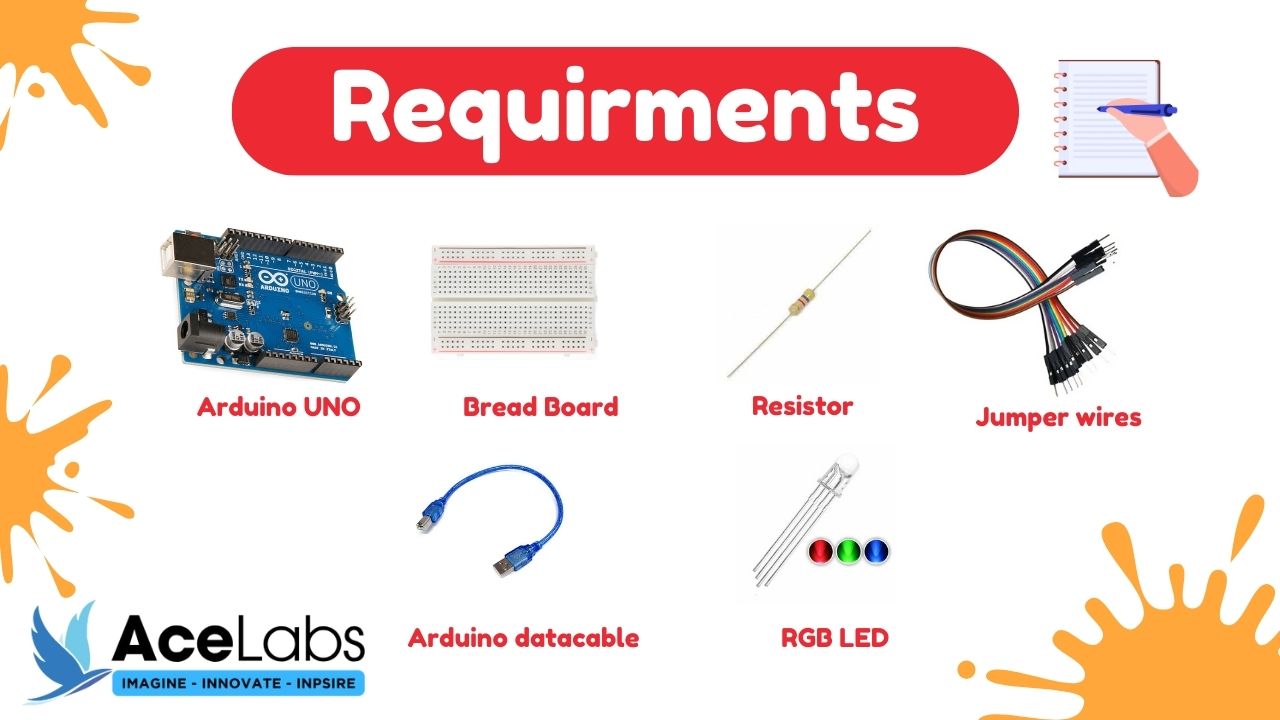
Components Required
Here is a list of Components that we will need to make this Project.

| Sr # | Item Name | Quantity |
|---|---|---|
| 1 | Arduino Uno | 1 |
| 2 | Breadboard | 1 |
| 3 | Resistors | 3 |
| 4 | Male to Male Jumper Wire | 4 |
| 5 | Arduino cable | 1 |
| 6 | RGB LED | 1 |
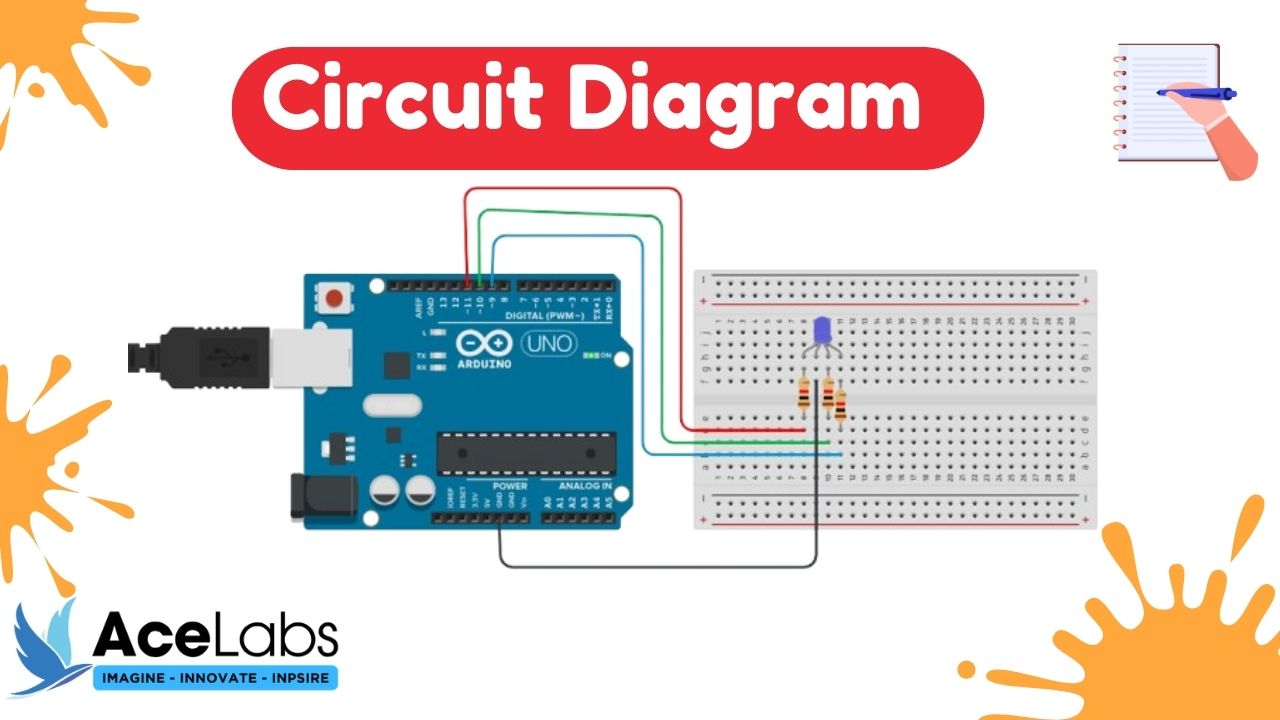
Wiring Diagram
Here is a Complete Wiring Diagram along with Instructions for this Project

Program / Code
Code is Explained in the Comments of the Code
int redPin = 11;
int greenPin = 10;
int bluePin = 9;

void setup() {
  pinMode(redPin, OUTPUT);
  pinMode(greenPin, OUTPUT);
  pinMode(bluePin, OUTPUT);
}

void loop() {
  // Red
  analogWrite(redPin, 255);
  analogWrite(greenPin, 0);
  analogWrite(bluePin, 0);
  delay(500);

  // Green
  analogWrite(redPin, 0);
  analogWrite(greenPin, 255);
  analogWrite(bluePin, 0);
  delay(500);

  // Blue
  analogWrite(redPin, 0);
  analogWrite(greenPin, 0);
  analogWrite(bluePin, 255);
  delay(500);
}
Thank you so much for going through our tutorial, we hope it was easy to follow and you enjoyed it, please share your feedback and pictures of the project (if you have made it) in the comments below .!


