The Best DIY STEM Tutorials and Projects

OVERVIEW
In the POT with Servo project, you’ll use a potentiometer (POT) to control the position of a servo motor. By turning the knob, you’ll send a signal using PWM (Pulse Width Modulation) to move the servo smoothly, showing how real-world actions can control motors with Arduino! 🛠️🎮
You can follow this video and the instructions below.
Video
Components Required
Here is a list of Components that we will need to make this Project.
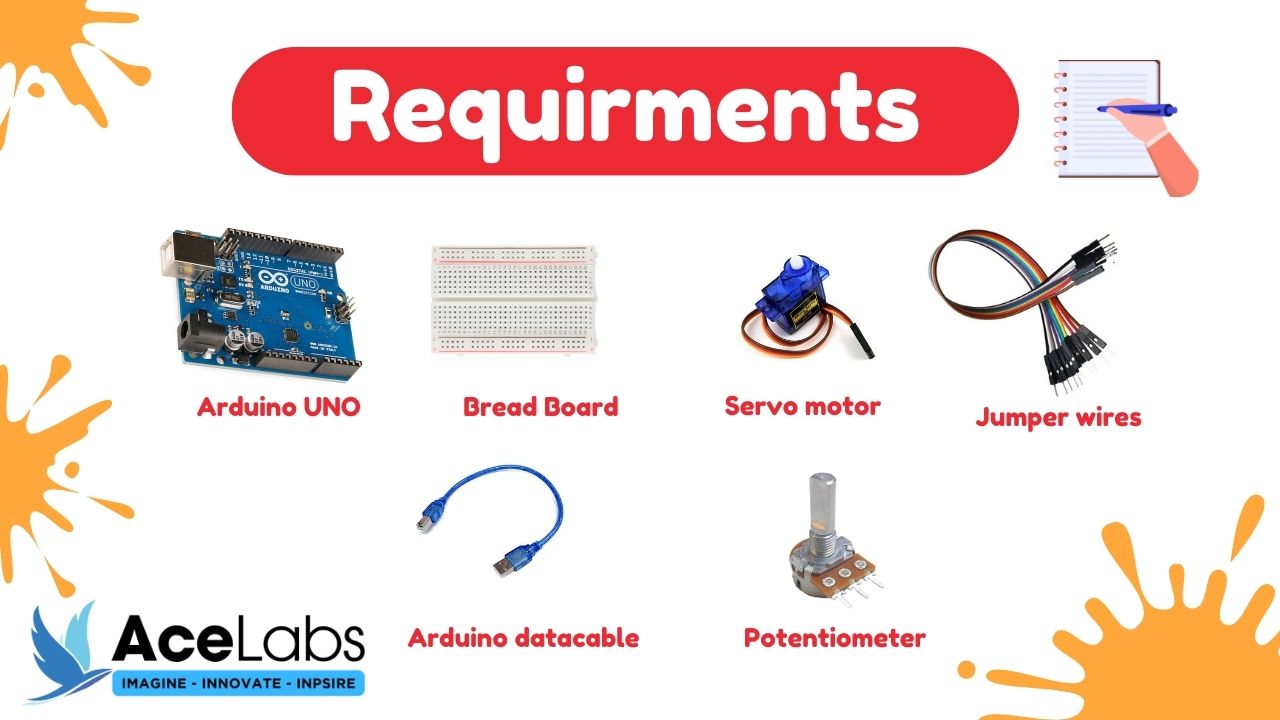
| Sr # | Item Name | Quantity |
|---|---|---|
| 1 | Arduino Uno | 1 |
| 2 | Breadboard | 1 |
| 3 | Servo motor | 1 |
| 4 | Jumper Wires | 6 |
| 5 | Arduino Cable | 1 |
| 6 | Potentiometer | 1 |
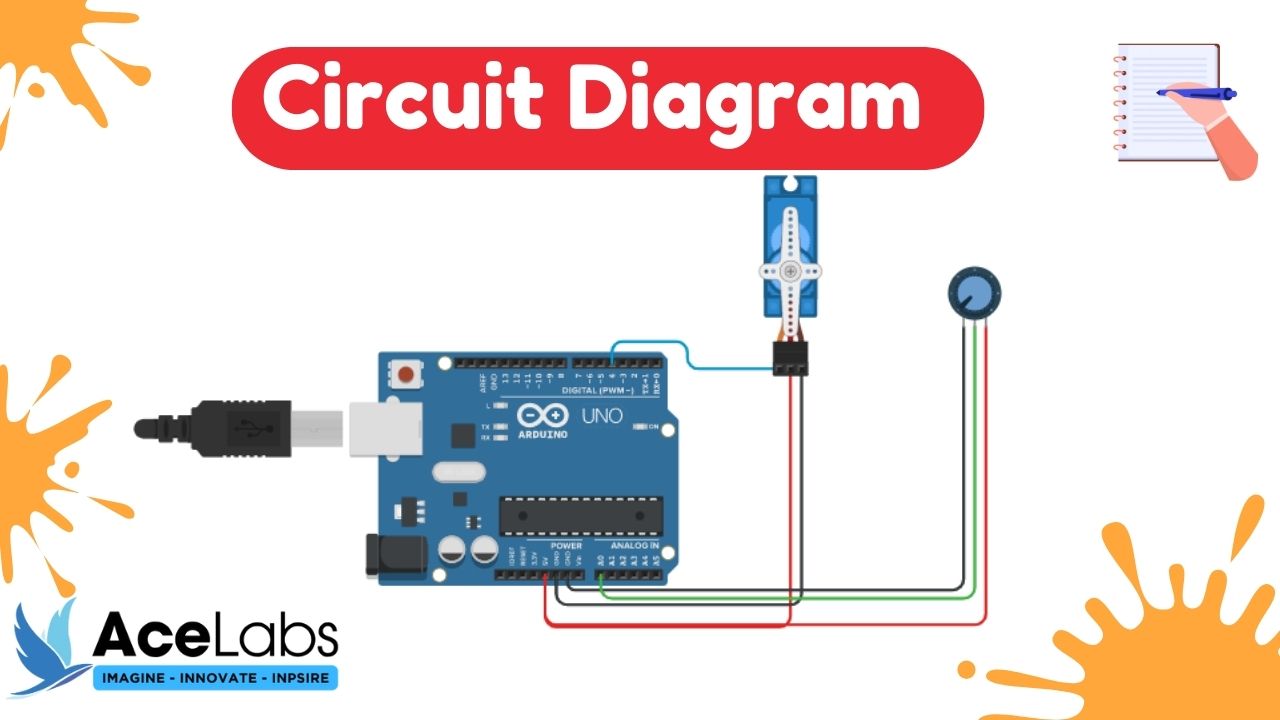
Wiring Diagram
Here is a Complete Wiring Diagram along with Instructions for this Project
Program / Code
Code is Explained in the Comments of the Code
#include <Servo.h>

const int potPin = A0;  // Potentiometer pin
const int servoPin = 6;  // Servo pin
Servo myServo;  // Create servo object

void setup() {
  myServo.attach(servoPin);  // Attach servo to pin
}

void loop() {
  int potValue = analogRead(potPin);  // Read potentiometer value
  int servoAngle = map(potValue, 0, 1023, 0, 180);  // Map pot value to servo angle
  myServo.write(servoAngle);  // Set servo angle
  delay(15);  // Wait for servo to move
}
Thank you so much for going through our tutorial, we hope it was easy to follow and you enjoyed it, please share your feedback and pictures of the project (if you have made it) in the comments below .!


