The Best DIY STEM Tutorials and Projects

OVERVIEW
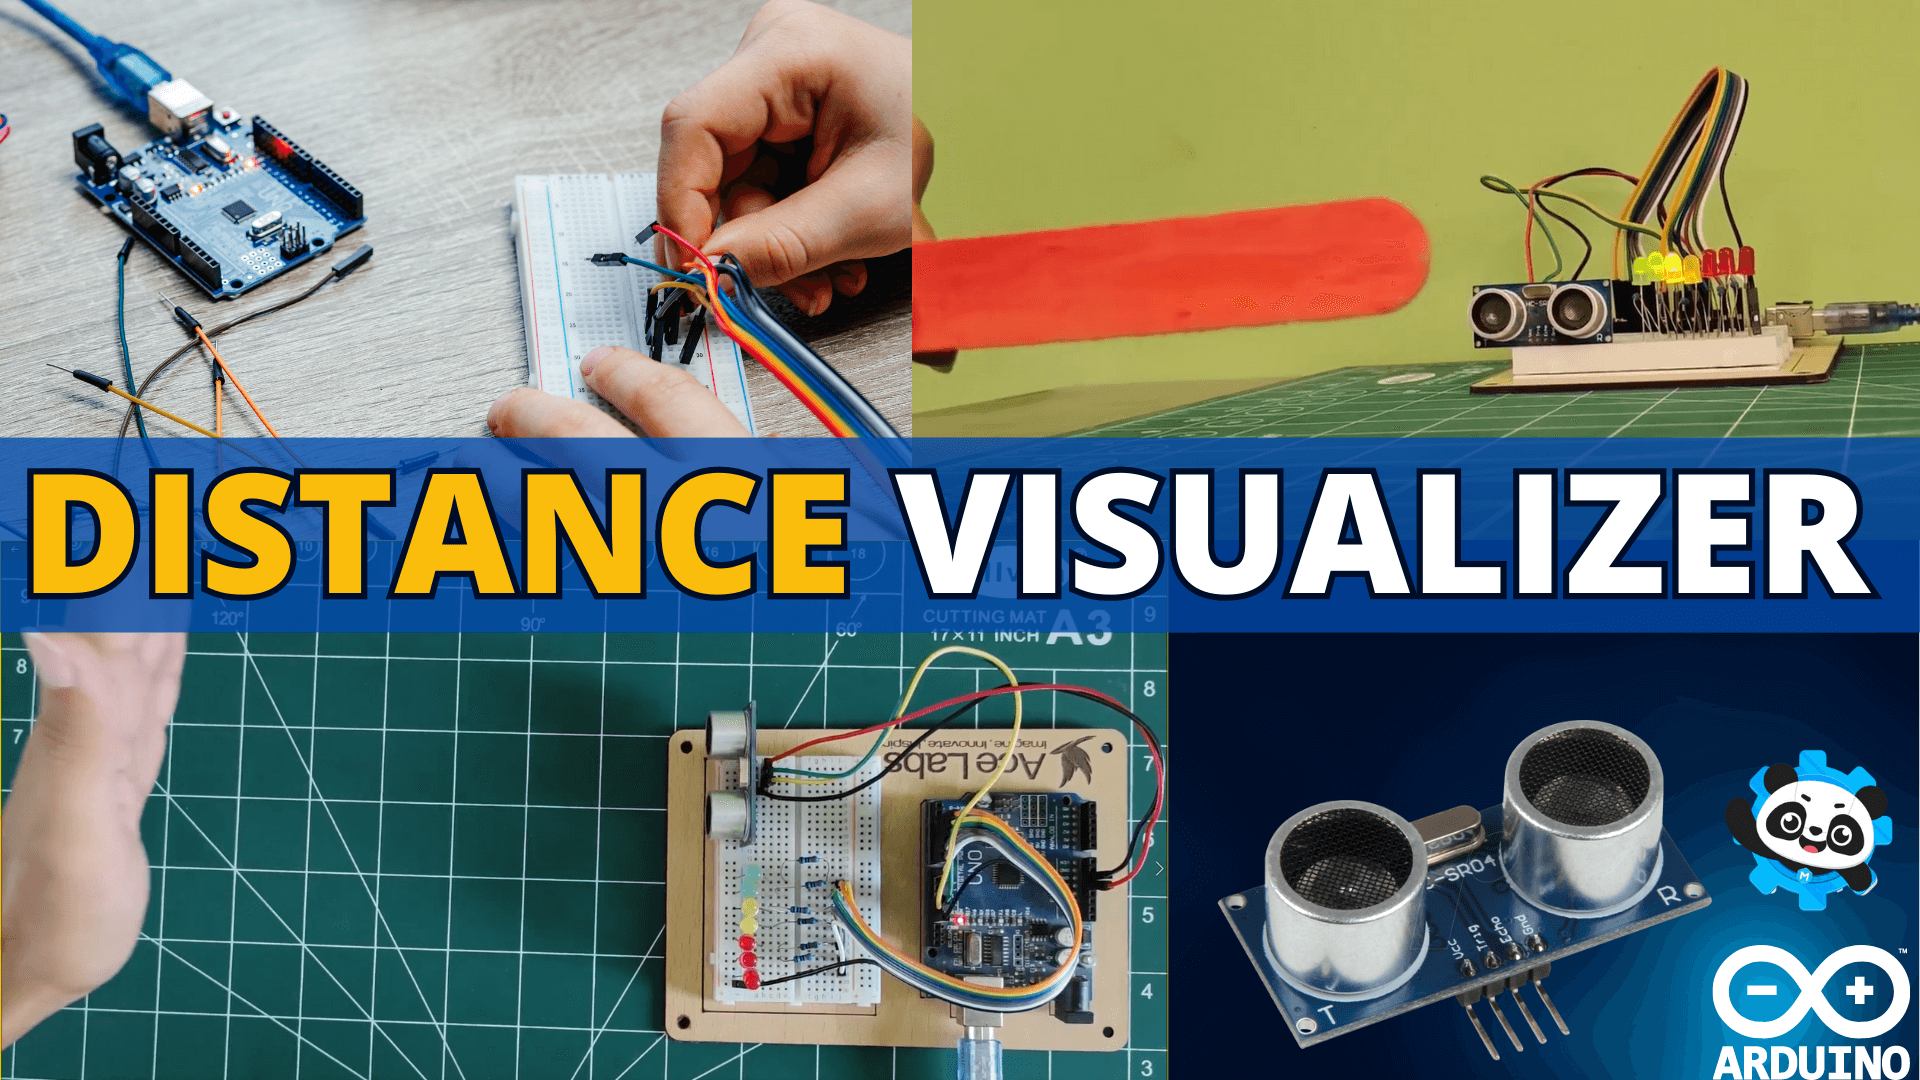
In this Tutorial, we are going to make a cool project called “Distance Visualizer.”
This project will be able to tell how close an object is, like your hand or a toy, and light up the colorful lights based on how close the object is. If the object is really close, all the lights will turn on! But if it’s a little farther away, only some lights will turn on. And if it’s far away, none of the lights will turn on.
We’ll have so much fun building this project, and you’ll learn some cool stuff about sensors, lights, and programming. Are you ready to make your very own Distance Visualizer? Let’s get started!
Components Required
For This Project You will need the following components:

| Sr # | Item Name | Quantity |
|---|---|---|
| 1 | Arduino Uno | 1 |
| 2 | Arduino Uno’s Cable | 1 |
| 3 | Distance Sensor (Ultra-Sonic Distance Sensor) | 1 |
| 4 | Red, Yellow and Green LED | 1 each |
| 5 | 470 Ohm Resistor | 3 |
| 6 | Jumper Wires | 8 |
Got everything? Great! Let’s move on to the assembly.
Circuit Diagram
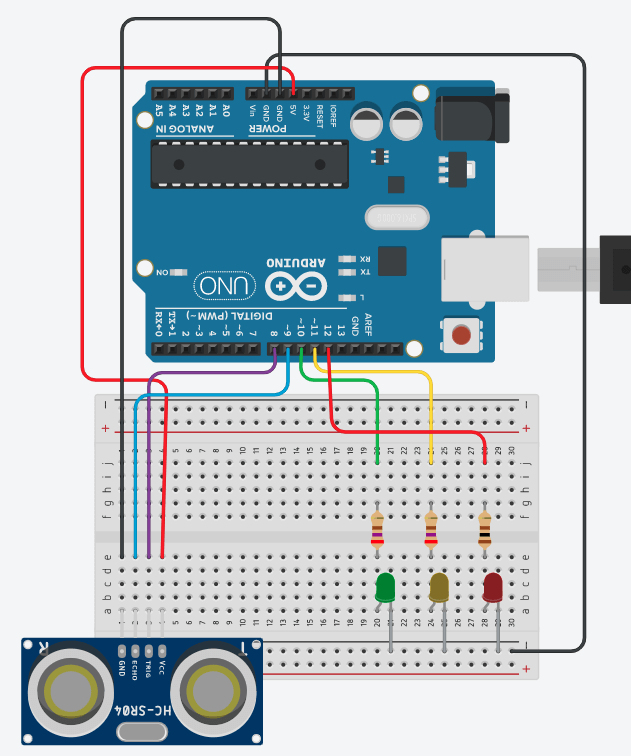
First Things First, Lets Setup the Circuit as shown in the image below

- Connect VCC pin of Distance Sensor to 5V pin of Arduino Uno
- Connect GND pin of Distance Sensor to GND pin of Arduino Uno
- Connect Echo pin of Distance Sensor to pin 9 of the Arduino Uno
- Connect Trig pin of the Distance Sensor to pin 8 of the Arduino Uno
- Connect the Cathode (shorter leg) of LEDs to GND
- Connect GND (-) line to GND of the Arduino Uno
- Connect the Anode (longer LEG) of Red LED to Pin 12 through a 470 Ohm Resistor
- Connect the Anode (longer LEG) of the Yellow LED to Pin 11 through a 470 Ohm Resistor
- Connect the Anode (longer LEG) of Green LED to Pin 10 through a 470 Ohm Resistor
Good Job! Our circuit is now set up and ready to go.
Coding With Mblock
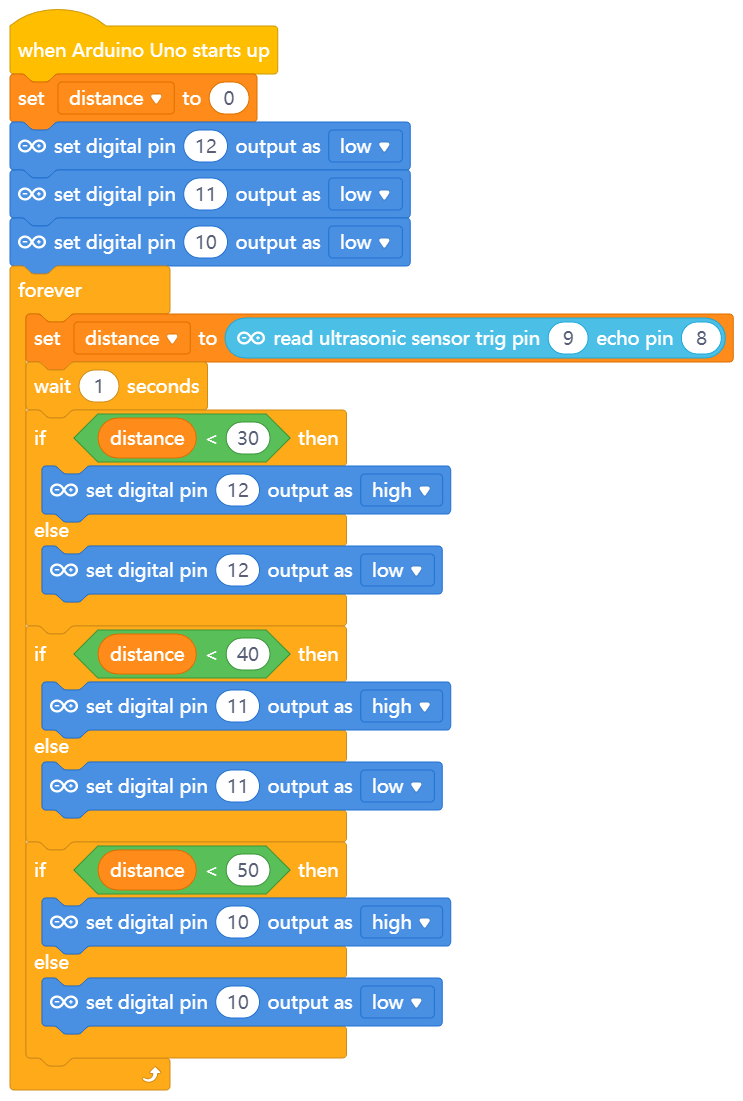
Let’s setup the block code as shown in the image
There is a mistake in this Code – Trig Pin should be 8 and Echo pin should be 9

Now upload the code to Arduino!
Video Tutorial
Note : Video will show actual video of a 6 LED version, you just have to create a 3 LED project for now (circuit diagram and code is for 3 led version)
Fantastic job! We hope you had a blast creating this project and found it both fun and engaging.
If you have any questions or need assistance, please don’t hesitate to leave a comment or get in touch with us. We’re always here to support you on your learning journey!
We’d love to hear how you felt about making this project, and we’re excited to bring you even more amazing projects in the future 🚀💡
Don’t forget to share a video of your completed project with us; we can’t wait to see what you’ve accomplished! Thank you!


I have followed the same code but all the lights are turning on. What should I do?
please share a video of the problem and pic of the complete circuit as well
How?