The Best DIY STEM Tutorials and Projects

OVERVIEW
An Arduino Uno is like a tiny computer that you can use to build cool gadgets and inventions. Imagine it’s a little brain that can help you control lights, motors, and even make sounds. You can connect different parts, like buttons, sensors, and lights to it, and then tell it what to do using a special computer language called code (remember code blocks for mBlock)
When you write the code and send it to the Arduino Uno, it will follow your instructions and make your invention come to life! People use it for all sorts of projects, like creating robots, making music, or even helping their plants grow. It’s a fun way to learn about electronics, coding, and how things work, and the best part is you can keep experimenting and building new things with it!
Exploring Parts Of Arduino Uno
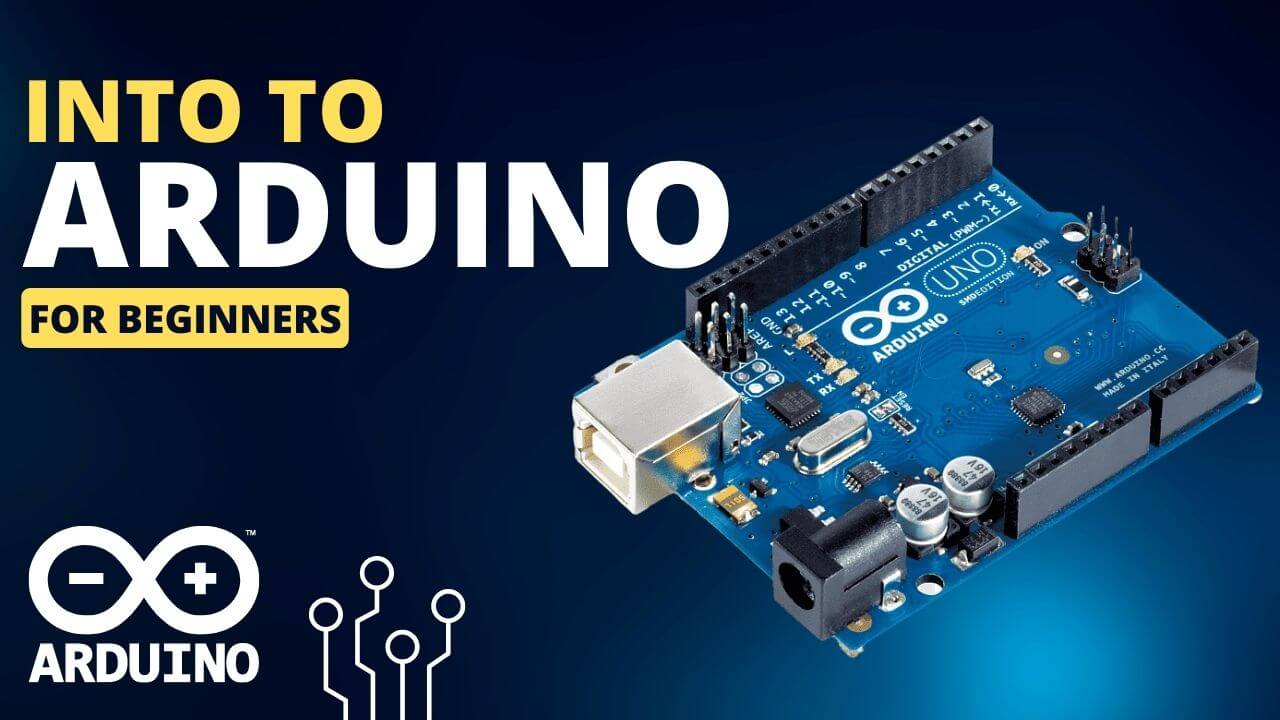
Take out your Arduino and look and the image below:

As You can See in The image above there 5 Major Portions of arduino uno that you need to know about right now
- Digital Pins: There are 14 of them, numbered from 0 to 13 (see the image above). Digital pins can be used in two ways: as inputs, like tiny ears that listen to messages, or as outputs, like little mouths that send messages. They can only understand two things: ON or OFF, which is like ‘yes’ or ‘no’ in computer language. They’re great for controlling things like lights, motors, or listening to buttons.
- Analog Pins: There are 6 of them, labeled A0 to A5. Analog pins are a little bit different because they can understand a whole bunch of messages in between ON and OFF. They’re like the digital pins’ super-smart cousins! They can be used as inputs to listen to parts that can send lots of different levels of information, like how bright a light is or how far an object is. However, they can’t send messages like digital pins can.
So, here are the main differences between digital and analog pins:
- Digital pins can understand only ON and OFF messages, while analog pins can understand a whole range of messages in between.
- Digital pins can be used as both inputs (listening) and outputs (sending messages), while analog pins can only be used as inputs (listening).
3) Power and GND: there are 3 types of pins in this area 3.3V, 5V, GND

- First, there are the power pins:
- 5V pin: This pin provides 5 volts of electricity, which is like the power your projects need to run. It’s like a power station that sends electricity to your little city.
- 3.3V pin: This pin provides 3.3 volts of electricity. Some parts of your projects might need a little less power, and that’s when you use this pin.
- Then, there are the ground pins:
- GND pins: These pins are like the earth or ground in the city. In real life, extra electricity goes into the ground to keep us safe. In your Arduino Uno, these pins help keep the electricity flowing smoothly and safely in your projects.
So Basically we can use these 5v, 3.3v, and GND to power our other electronic components (like a breadboard, LEDs, Sensors, etc)

4) Power Source: We can use this pin to connect Arduino to the battery or an adapter (Note: Don’t connect to any power source >9V, this might damage Arduino) (shown in the image above)
5) Data Cable: This is where you plug in a USB cable to connect your Arduino Uno to your computer. This connection lets you send code to the Arduino and powers it while it’s connected. So, just plug in the cable, and you’re ready to create awesome projects! (shown in the image above)
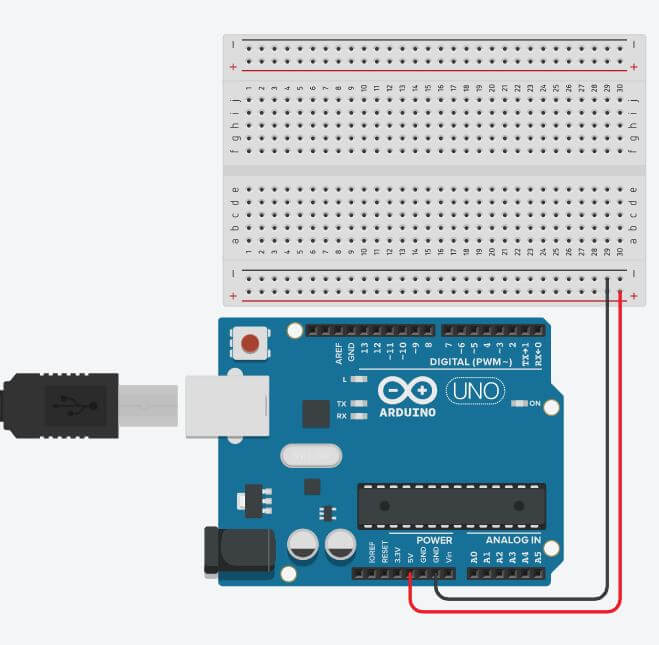
Note: For the upcoming basic electronics projects, you will be using the Arduino’s 5V and GND pins to power the breadboard, instead of using a battery directly. To achieve this, simply connect the Arduino to a laptop or an external battery pack to supply power. This will ensure a stable and convenient power source for your projects. As shown in the image below:


