The Best DIY STEM Tutorials and Projects

OVERVIEW
In this project we will make Intruder Alarm using Arduino Uno, Ultrasonic Sensor and a Buzzer, we will use an ultrasonic sensor to detect movement and turn on the buzzer and LED if there is any movement.
You can follow this video and the instructions below to make this Amazing Automatic Door Project.
Video
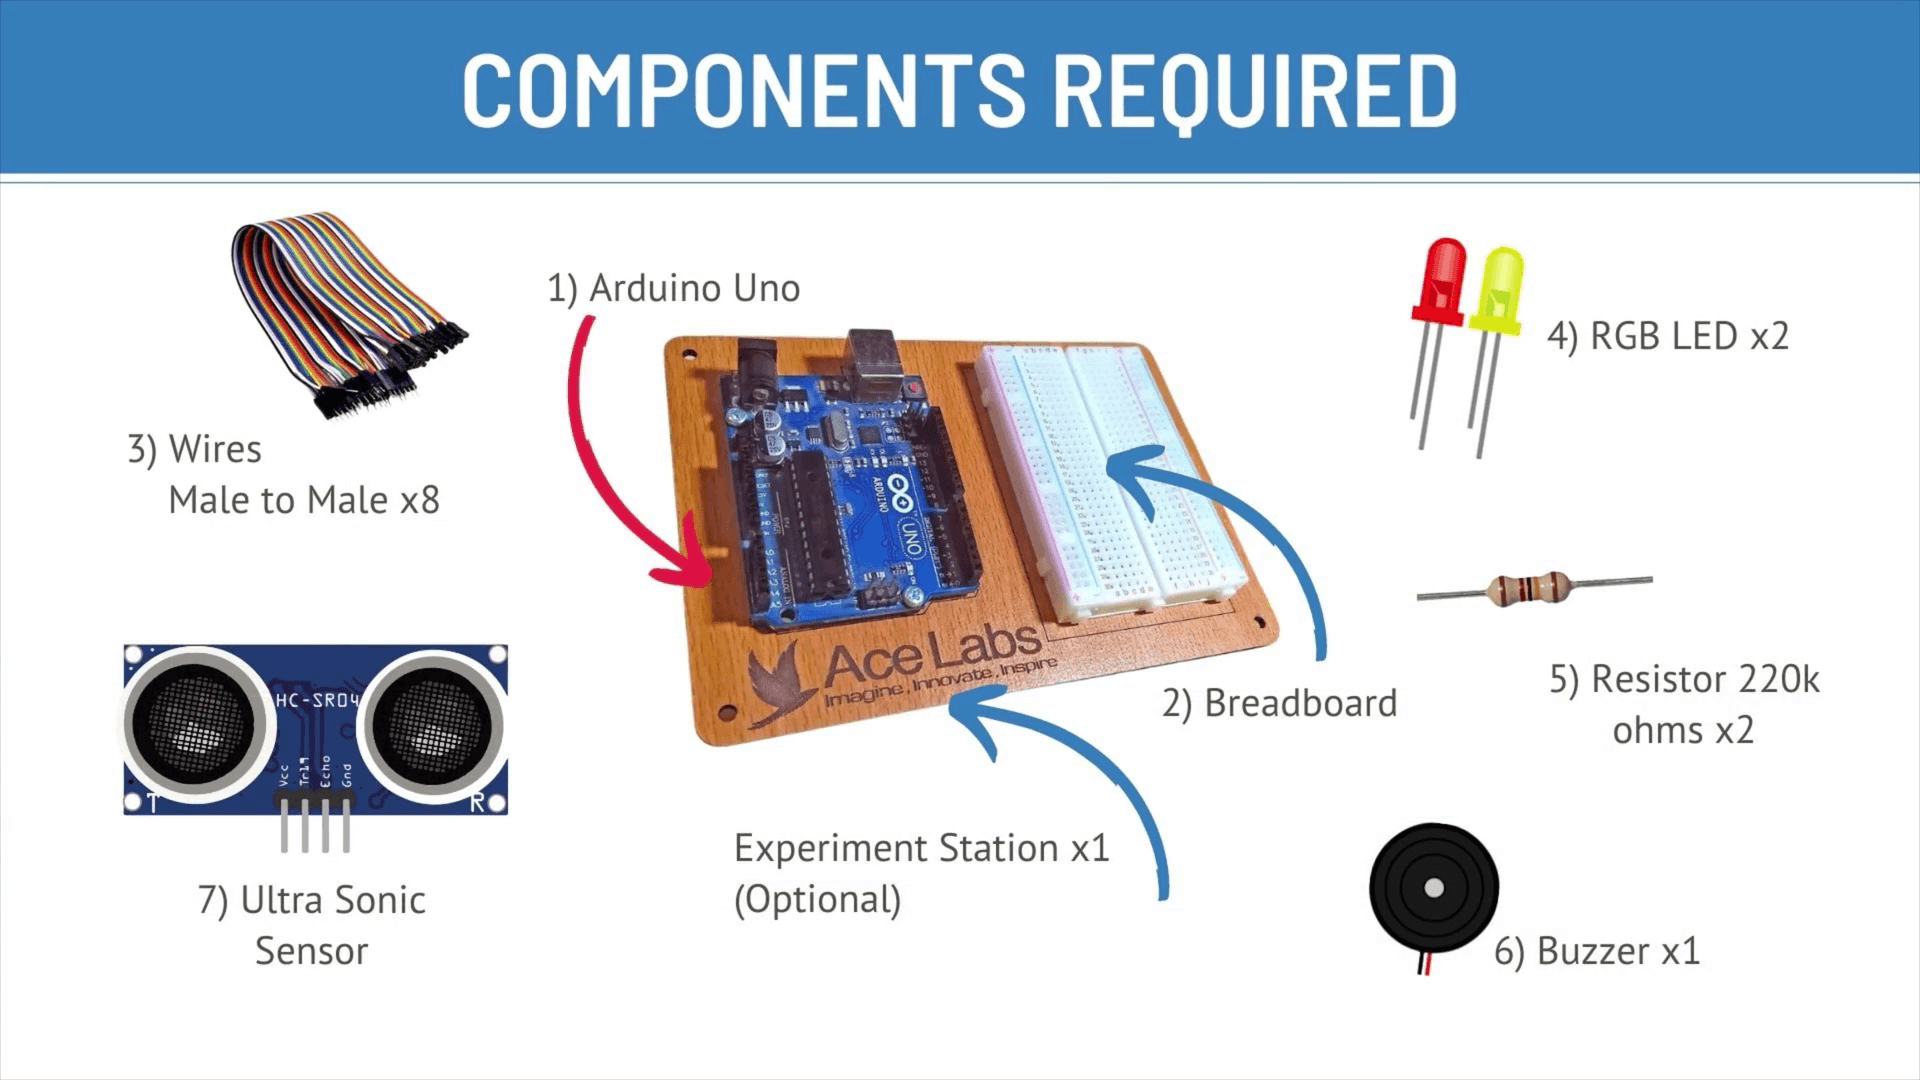
Components Required
Here is a list of Components that we will need to make this Project.

| Sr # | Item Name | Quantity |
|---|---|---|
| 1 | Arduino Uno | 1 |
| 2 | Breadboard | 1 |
| 3 | Male to Male Jumper Wire | 8 |
| 4 | LED | 2 |
| 5 | Resistors 220k ohms | 2 |
| 6 | Buzzer | 1 |
| 7 | Ultrasonic Sensor | 1 |
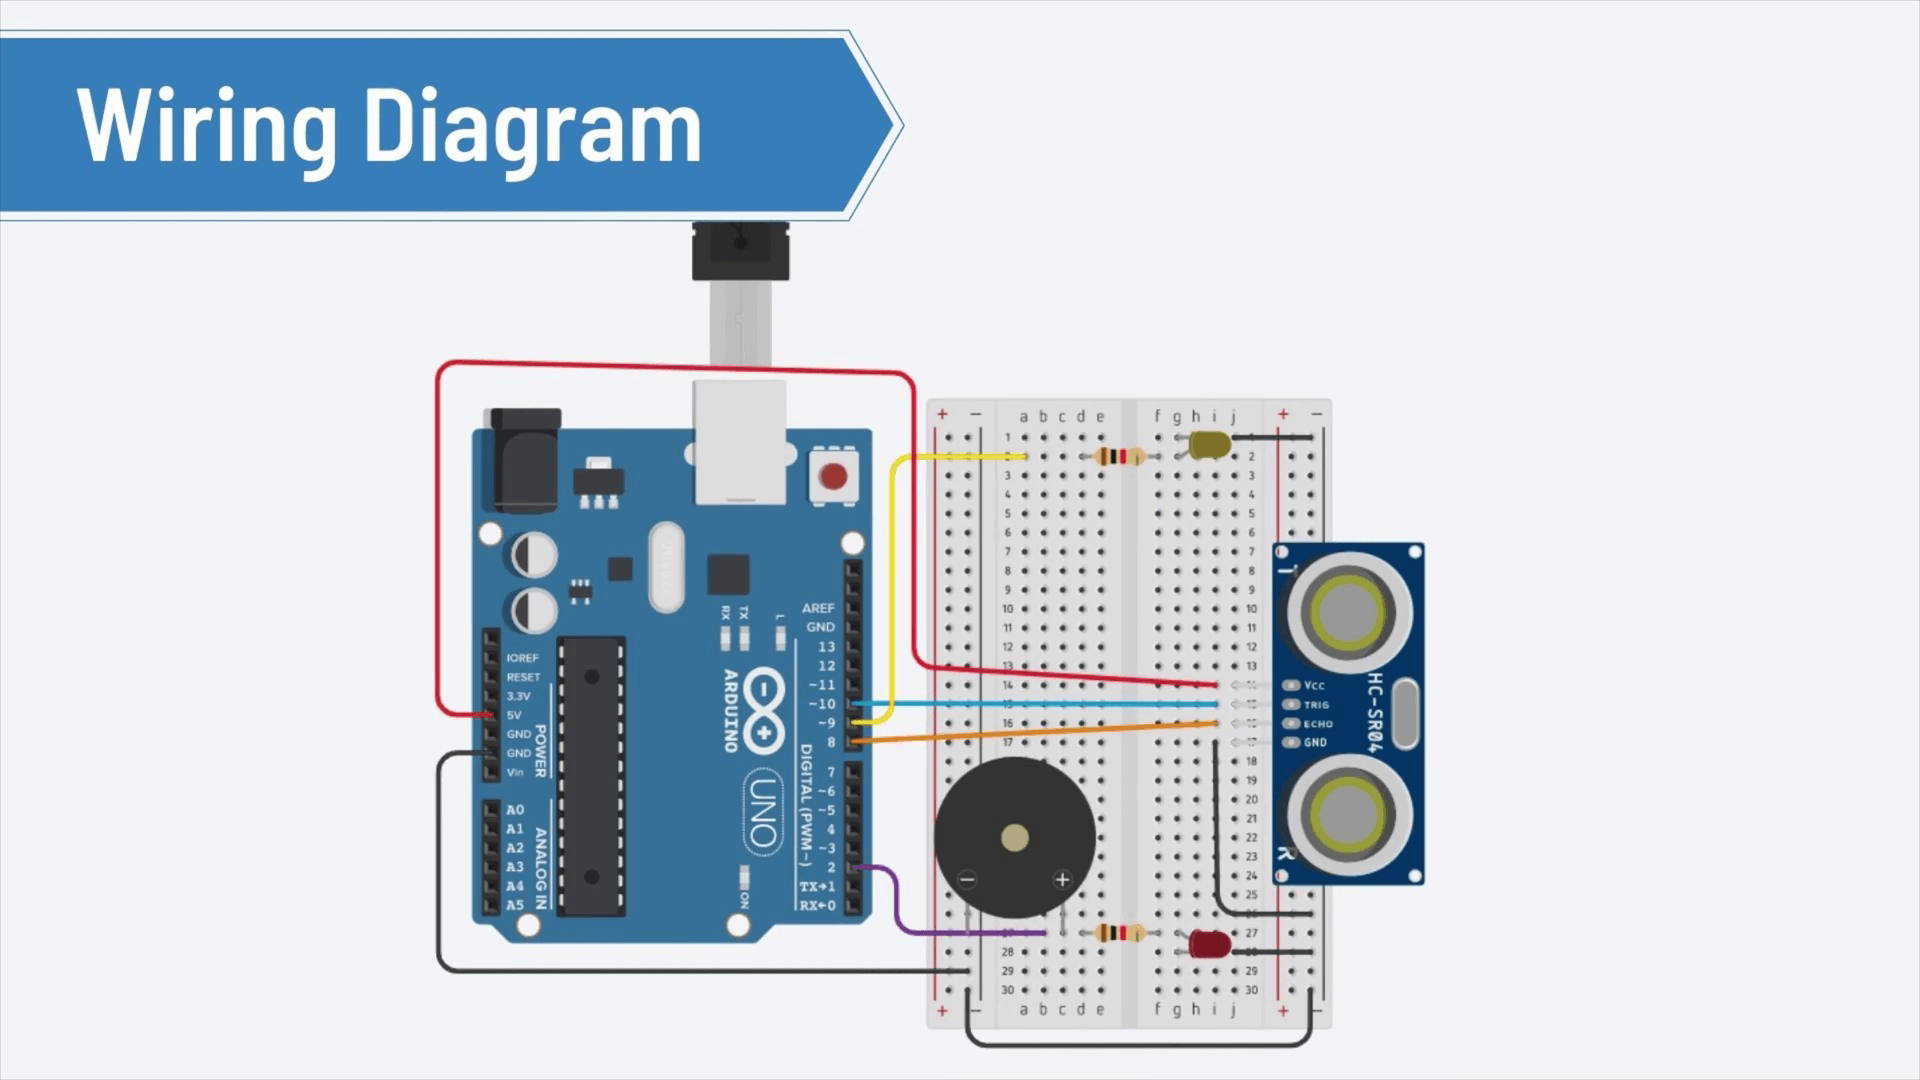
Wiring Diagram
Here is a Complete Wiring Diagram along with Instructions for this Project

Program / Code
Code is Explained in the Comments of the Code
/* Intruder Alarm by --- AceLabs --- */

  #define echo 2
  #define trig 3
  #define outA 8  // Red LED
  #define outB 9  // Green LED
  #define outC 10  // Buzzer

  float  duration; // time taken by the pulse to return back
  float  distance; // oneway distance travelled by the pulse

  const int intruderDistance = 10;
  // the minimum distance upto which the sensor is able to sense any object

  void setup() {

    pinMode(trig, OUTPUT);
    pinMode(echo, INPUT);

    pinMode(outA, OUTPUT);
    digitalWrite(outA, LOW);

    pinMode(outB, OUTPUT);
    digitalWrite(outB, LOW);

    pinMode(outC, OUTPUT);
    digitalWrite(outC, LOW);
    Serial.begin(9600);

  }

  void loop() {

    time_Measurement();
    distance = (float)duration * (0.0343) / 2;

    // calculate the oneway distance travelled by the pulse
    Serial.println(distance);
    alarm_condition();

  }

  void time_Measurement()
  {
    // function to measure the time taken by the pulse to return back
    digitalWrite(trig, LOW);
    delayMicroseconds(2);

    digitalWrite(trig, HIGH);
    delayMicroseconds(10);
    digitalWrite(trig, LOW);

    duration = pulseIn(echo, HIGH);
  }

  void alarm_condition()
  {
     //function to execute the output commands based on the sensor input
     if(distance<=intruderDistance)
    {
      digitalWrite(outA,HIGH);
      digitalWrite(outB,LOW);
      analogWrite(outC,200);}

    else
    {
      digitalWrite(outA,LOW);
      digitalWrite(outB,HIGH);
      analogWrite(outC,0);
       }
  }
Thank you so much for going through our tutorial, we hope it was easy to follow and you enjoyed it, please share your feedback and pictures of the project (if you have made it) in the comments below .!


